Commercial
Vehicle Inspection Checklist
A commercial vehicle inspection checklist is used to make sure there are no important safety checks missed when preforming a vehicle pre-trip inspection.
The purpose of a vehicle pre-trip inspection is to make sure the
vehicle is safe to operate. Ensuring that your vehicle is safe to operate protects you
the driver, others and cargo.
Learning how to perform a proper commercial vehicle inspection pre-trip is the most important step on your way to your new career as a commercial driver. Remember, your safety and the safety of others on the road is at stake.
You are inspecting your vehicle to make sure it is safe to
drive before you take your 40 ton rig out on the highway at 55 – 65 miles per
hour. You may have the safest driving practices on the road, but if your rig is
not safe to drive, you put yourself, others, your cargo, your rig, other
vehicles and property at risk. Be safe, study the vehicle inspection checklist as if your life and the life of others depended on
it.
Free Vehicle Inspection Checklist
I am posting this free commercial vehicle inspection checklist so that others may benefit from my many hours of research and study.
Before I got my Class A Commercial Driver's License, I was stuck making minimum wage. I was making minimum wage for many years because I had no special marketable skills. My future income trajectory wasn't looking very promising.
I decided that the most suitable skill for me was to learn to become a cross-country big rig truck driver. I couldn't afford truck driving school on minimum wage, but I did qualify for a loan to go to school. I couldn't afford to take a day off work, so I found a truck driving school that had classes available on the weekends. Six to eight weeks later, I had my Class A Commercial Driver's License. I got a job right out of school. From that day on, I doubled my income every year after that, for the next four years.
Today I make more money
than most four-year college grads. Plus, I have better prospects for always
finding work. I am only pointing this out because as for money making ideas,
getting a Class A Commercial Driver's License and becoming a truck driver is a good job with a great future for both men
and women alike. Plus, you get paid to travel.
OK, so what does this have to do with the commercial vehicle inspection checklist? When I went to truck driving school, I was only briefly taught about the CDL pre-trip inspection checklist procedure. Since then, requirements for a CDL have gotten stricter. Before I got my current job, I had to research, study and perform a commercial vehicle inspection. The main reference I used for my CDL pre-trip inspection checklist is the "Commercial Driver's Handbook", which can be found at your local DMV, Department of Motor Vehicle. Unfortunately, I found the DMV commercial vehicle inspection somewhat difficult to follow and learn.
Below is a very thorough, free commercial vehicle inspection checklist that will help you make sure that there are no important safety checks missed when preforming your vehicle inspection.
Follow your CDL vehicle inspection checklist the same way each time so you will learn all the steps and be less likely to forget something.
Do not risk your life or the life of another in an unsafe vehicle.
(Note, the commercial vehicle inspection checklist is also known as the Commercial Driver's License pre-trip inspection or CDL vehicle inspection checklist and CDL pre-trip inspection checklist.)
Pre-trip Inspection - Tools: (flashlight, gloves, tire bubby)
Your States’ examiner may require a slightly different inspection checklist.
A Commercial Vehicle Pre-Trip Inspection Checklist includes:
Approach:
- Look for any hazards to vehicle movement such as pedestrians, animals, low hanging wires, tree limbs, other vehicles, building structures or other objects.
- Check the overall vehicle condition. Note if the vehicle is leaning.
- Look for any damages.
- Look for fresh puddles from engine oil, transmission fluid, coolant, grease or fuel leaks under the vehicle.
- Ensure there is a license plate present and secure.
- Ensure you have the correct assigned vehicle.
- Chock Tractor Wheels.
Vehicle Inspection Checklist:
- Tractor Cab -
- Check your vehicle's service due date.
- Ensure the safety handle is secure and steps are clear of debris before your three-point entry into the cab.
- Ensure brakes are set.
- Review last vehicle inspection report. Make sure any safety issue write-ups are repaired and signed off by the maintenance mechanics. (Inspect any repairs done during pre-trip.) Sign the previous Driver’s report if defects have been verified as repaired.
- Put
tachometer chart in if equipped.
- Ensure the vehicle registration is present and current.
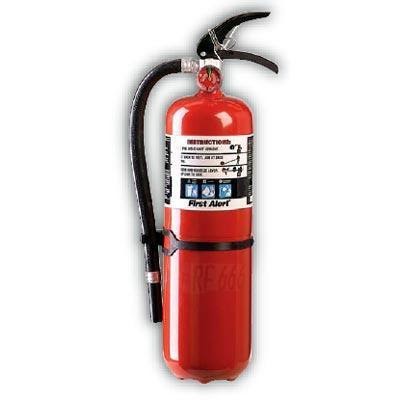
- Emergency equipment: Ensure emergency equipment like: fire extinguisher, triangles, and accident reporting kit are present. Ensure emergency triangles are secure and in working condition.
- Fire extinguisher:
- Ensure fire extinguisher is present and secure.
- Ensure the nozzle is clear.
- Ensure the needle is in the green range.
- Ensure that the safety pin in position.
- Check the service date. The extinguisher is good for 1 year of service after the last service date.
- Ensure the correct extinguisher is issued (10-BC).
- Turn the high beam headlights and left blinker on. (If it is dark use the light reflection to check brake lights, blinkers, high and low beams)
- Take key and exit using a 3-point contact.
- Take gloves, tire buddy and flashlight.
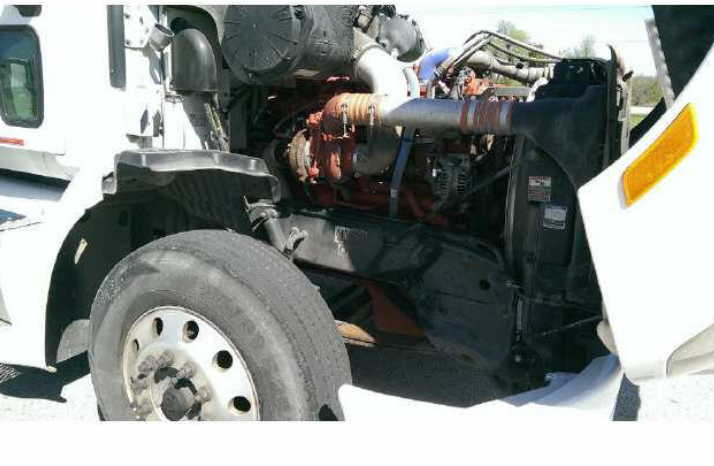
The Commercial Vehicle Pre-Trip Inspection Exam requires you to point out vehicle components as you are performing your vehicle inspection and explain what you are checking and why to the examiner. The exam is designed to test your knowledge of your vehicle’s components and check your ability to know if the components meet safety standards. The vehicle inspection test includes an under the hood engine compartment inspection. Again, explain what you are looking for and why. A driver is not required to crawl under the vehicle during the test.
Vehicle Inspection Checklist -
"Walk-Around":
Lights:
- Ensure head lights, blinkers, marker lights and clearance lights are clean, secure, working and correct color.
- Cancel blinkers. Turn off lights. Pull the trolley brake down to check the brake lights. Use the foot pedal if you have a helper to check the light for you.
- Release trolley brake lever and turn flashers on to ensure they work front and back.
- Clean lights and reflectors during pre-trip as needed.
- Ensure parking lights come on with headlights
- Checks of brake, turn signals and 4-way flasher functions must be done separately.
- Doors:
- Check doors for dents or scratches.
- Check lettering. Ensure State # is visible.
- Ensure door windows, door locks and door hinges are secure and working.
- Windows & Mirrors: Ensure windows and mirrors are clean, not cracked or broken and mirror mounts are secure.
- Fuel Tanks:
- Ensure fuel tanks are secure with no signs of slipping, damages or leaks.
- Ensure fuel crossover line is secured, not damaged or leaking.
- Ensure the fuel cap gasket is present and cap is secured.
- Check fuel level.
- Steps: Ensure steps are secure, not damaged and clear of debris.
- Bumper: Ensure bumper is secure with no damages. Ensure tag is present, clean and secure.
- Grill: Ensure grill is clear of debris with no damages and radiator is not blocked or damaged.
- Hood: Check hood and fenders for damages. Unlock and lift hood. Ensure hinges are secure.
- Windshield Wipers: Step on steer tire to check wiper arms tension and condition. Ensure blades are secure, not stiff, worn, torn or frayed.
- Windshield: Ensure windshield is clean, not cracked or broken with no illegal stickers.
- Steer Tires:
- Check for minimal tread depth of 4/32 on steer tires.
- Ensure front tires are not recapped, retreaded or re-grooved.
- Check for proper inflation, tread separation, uneven wear patterns, bulges or foreign objects.
- Check for cuts to tire sidewalls inside and out. No tire fabric should show through the rubber tread or sidewall.
- Ensure rims are not cracked, bent or welded on.
- Ensure hub oil is at the correct level and not leaking.
- Ensure lug nuts are present, secure, not damaged or misaligned. (Rust trails or shinny rubbing areas indicate loose lug nuts.)
- Ensure valve stems are centered, no damages, with valve stem covers present and secure.
- Steer Tire Brakes:
- Minimal brake lining is ¼ inch.
- Ensure there is no oil or grease on brake linings.
- Ensure brake linings are secure and brake drums have no cracks, dents or holes.
- Ensure brake chambers are secure, not leaking, cracked or dented with all nuts, bolts and cotter pins in place and secure.
- Ensure brake hose connections are secure and brake hoses are not cracked, cut, worn or rubbing and have no signs of leaking.
- Suspension:
- Check leaf springs, spring hangers, bushings, bearing plates, shackles, U-bolts, torque rods, control arms and eye bolts to ensure all parts are secure with no missing, worn, cracked, broken, loose, distorted or damaged parts.
- Ensure there are no broken or shifting of leaf springs.
- Ensure shock absorbers are secure and not leaking.
- Ensure bellows have no cuts, cracks or air leaks. (Do not move with less than 80 psi.)
- Ensure bellow supports are secure.
- Tractor Chassis:
- Ensure there is no damage to the tractor chassis/frame or cross members.
- Check frame brackets, axles, axle seats, anchor plates and clamp bolts to ensure there are no damages and no missing, broken or cracked parts.
- Ensure there are no missing or loose bolts or nuts and no broken or cracked welds.
- Ensure there are no
loose or hanging hoses, electrical wiring or foreign objects under tractor.
- Steering:
- Check steering ring knuckle, steering arms, tie rods, drag link, pitman arm and universal joint for wear. (Steering wheel shaft must be physically checked for play.)
- Ensure steering gear box is secure and not leaking.
- Check steering linkage for wear or damaged parts.
- Check steering linkage for missing or loose bolts, nuts or cotter pins.
Vehicle Inspection
Checklist for
Engine Compartment
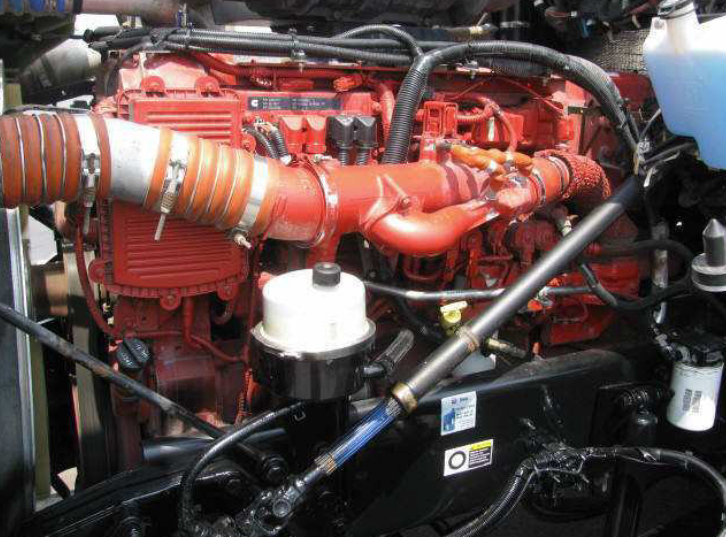
- Check for fluid leaks on the motor or on the ground under the tractor.
- Fluids:
- Check coolant, windshield wash, power steering fluid, engine oil and transmission oil. (Automatic transmission fluids need to be checked with engine running).
- Fluid levels must be above the refill mark and caps secured.
- Check brake fluid on vehicles with hydraulic brakes.
- Hoses: Ensure hose connections are secure and hoses are not cracked, cut, worn or rubbing and have no signs of leaking.
- Belts: Check belt tightness (alternator, water pump, air compressor, and fan). The maximum belt play is ¾ inch. There should be no signs of slipping, cracking, fraying or excessive wear.
- Electrical: Electrical wires should be secure with no corrosion or bare wires. Wire insulation should not be worn or cracked.
- Close and latch hood on both sides.
Vehicle
Inspection Checklist
"Walk-Around"- continued:
- Ensure catwalk, if equipped, is secure and clear of debris.
- Airlines:
- Ensure airlines hoses are not crimped or cut and are properly secured to the tractor.
- Ensure glad hands/coupler connections are properly secured to the airline hoses and clear of debris.
- Ensure grommets/rubber seals are not cut, cracked or worn.
- Ensure air lines are secured against any snagging or rubbing.
- Battery: Ensure battery/s and connections are secure. Battery cells should be full, caps secure, vent caps clear (except maintenance-free batteries) and no corrosion on battery connections. Ensure battery box is secure, latched and not leaking or damaged.
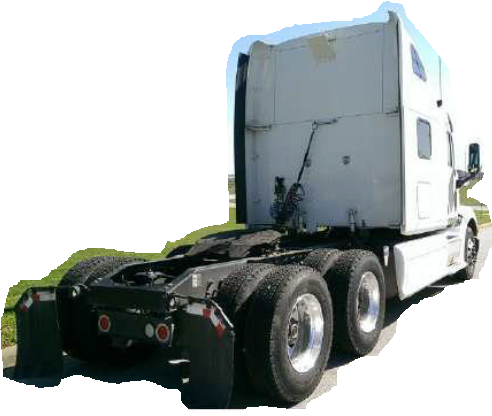
- Under tractor: Check for loose or hanging hoses, wiring or foreign objects under tractor. Move UP
- Differential:
- Ensure drive line is not bent and is clear of foreign objects.
- Ensure universal bushings are secure and not worn.
- Ensure the differential housing is not damaged or leaking.
- Tandems/Duals:
- Tandem/Dual tread should be a minimum if 2/32.
- Duals should have no uneven or excessive wear spots, no foreign objects in or between duals.
- Duals should have no mismatched tire sizes and not radial and bias-ply tires used together.
- Dual tires should not come into contact with each other or any parts of the vehicle.
- There should be no damages to the sidewalls inside or out.
- There should be no damage or welding on tire rims. (A damaged rim can cause a tire to lose pressure or come off.)
- Ensure clamps, spacers and lug nuts are present and secure. (Rust trails or shinny rubbing areas indicate loose lug nuts.)
- Ensure valve stems are centered, not cut or cracked with valve stem covers present and secure.
- (After a tire has been changed, stop a short while later to recheck the tightness of the wheel fasteners.)
- Tractor Dual Tire Brakes:
- Minimal brake lining is ¼ inch.
- Ensure there is no oil or grease on brake linings.
- Ensure brake linings are secure and brake drums have no cracks, dents or holes.
- Ensure brake chambers are secure, not leaking, cracked or dented with all nuts, bolts and cotter pins in place and secure.
- Ensure brake hose connections are secure and brake hoses are not cracked, cut, worn or rubbing and have no signs of leaking.
- Spare Tire:
- Ensure spare tire rack is not damaged.
- Ensure spare tire is secure, properly inflated, not damaged and proper size.
- Fifth wheel:
- The fifth wheel mounting plate should be secure with no cracks or missing bolts.
- Ensure the fifth wheel is well greased, not cracked, broken or worn and has no missing parts.
- Ensure the fifth wheel is tilted downwards to the rear with locking jaws open and the safety unlocking handle in the automatic lock position.
- Ensure the fifth wheel slide is locked on both sides.
- Mud flaps: Ensure mud flaps are present, secure and not damaged.
- Rear license plate: Ensure rear license plate is present, secure, clean and visible with the license plate light present and working.
- Air Dryer: Ensure the air dryer is secure with no damages and no missing bolts.
- Air Tanks: Ensure the air tanks are secure with no damages and no missing bolts. Drain the air tanks “sludge” daily.
- Exhaust pipe:
- Ensure exhaust pipe is present and secure with no damages, no missing mounting brackets, clamps or bolts and no signs of leaks. (Leaks would show black soot at leak point.) (A broken exhaust system can let poisonous fumes into the vehicle.)
- Ensure there is no wires, fuel or airlines touching the exhaust.
- Ensure there is no excessive smoke.
- Seats:
- Seats should be in good condition.
- Ensure seat mountings are secure with no missing or loose bolts.
- Ensure seat belts are in good condition, secure with no missing or loose bolts.
- Ensure buckles are secure, not damaged and working.
- Foot Controls: Ensure foot controls are clear of oil or grease with no loose items that can interfere with the safe operation of the vehicle.
Vehicle Inspection
Checklist - in CAB:
Make a 3-point entry into cab.
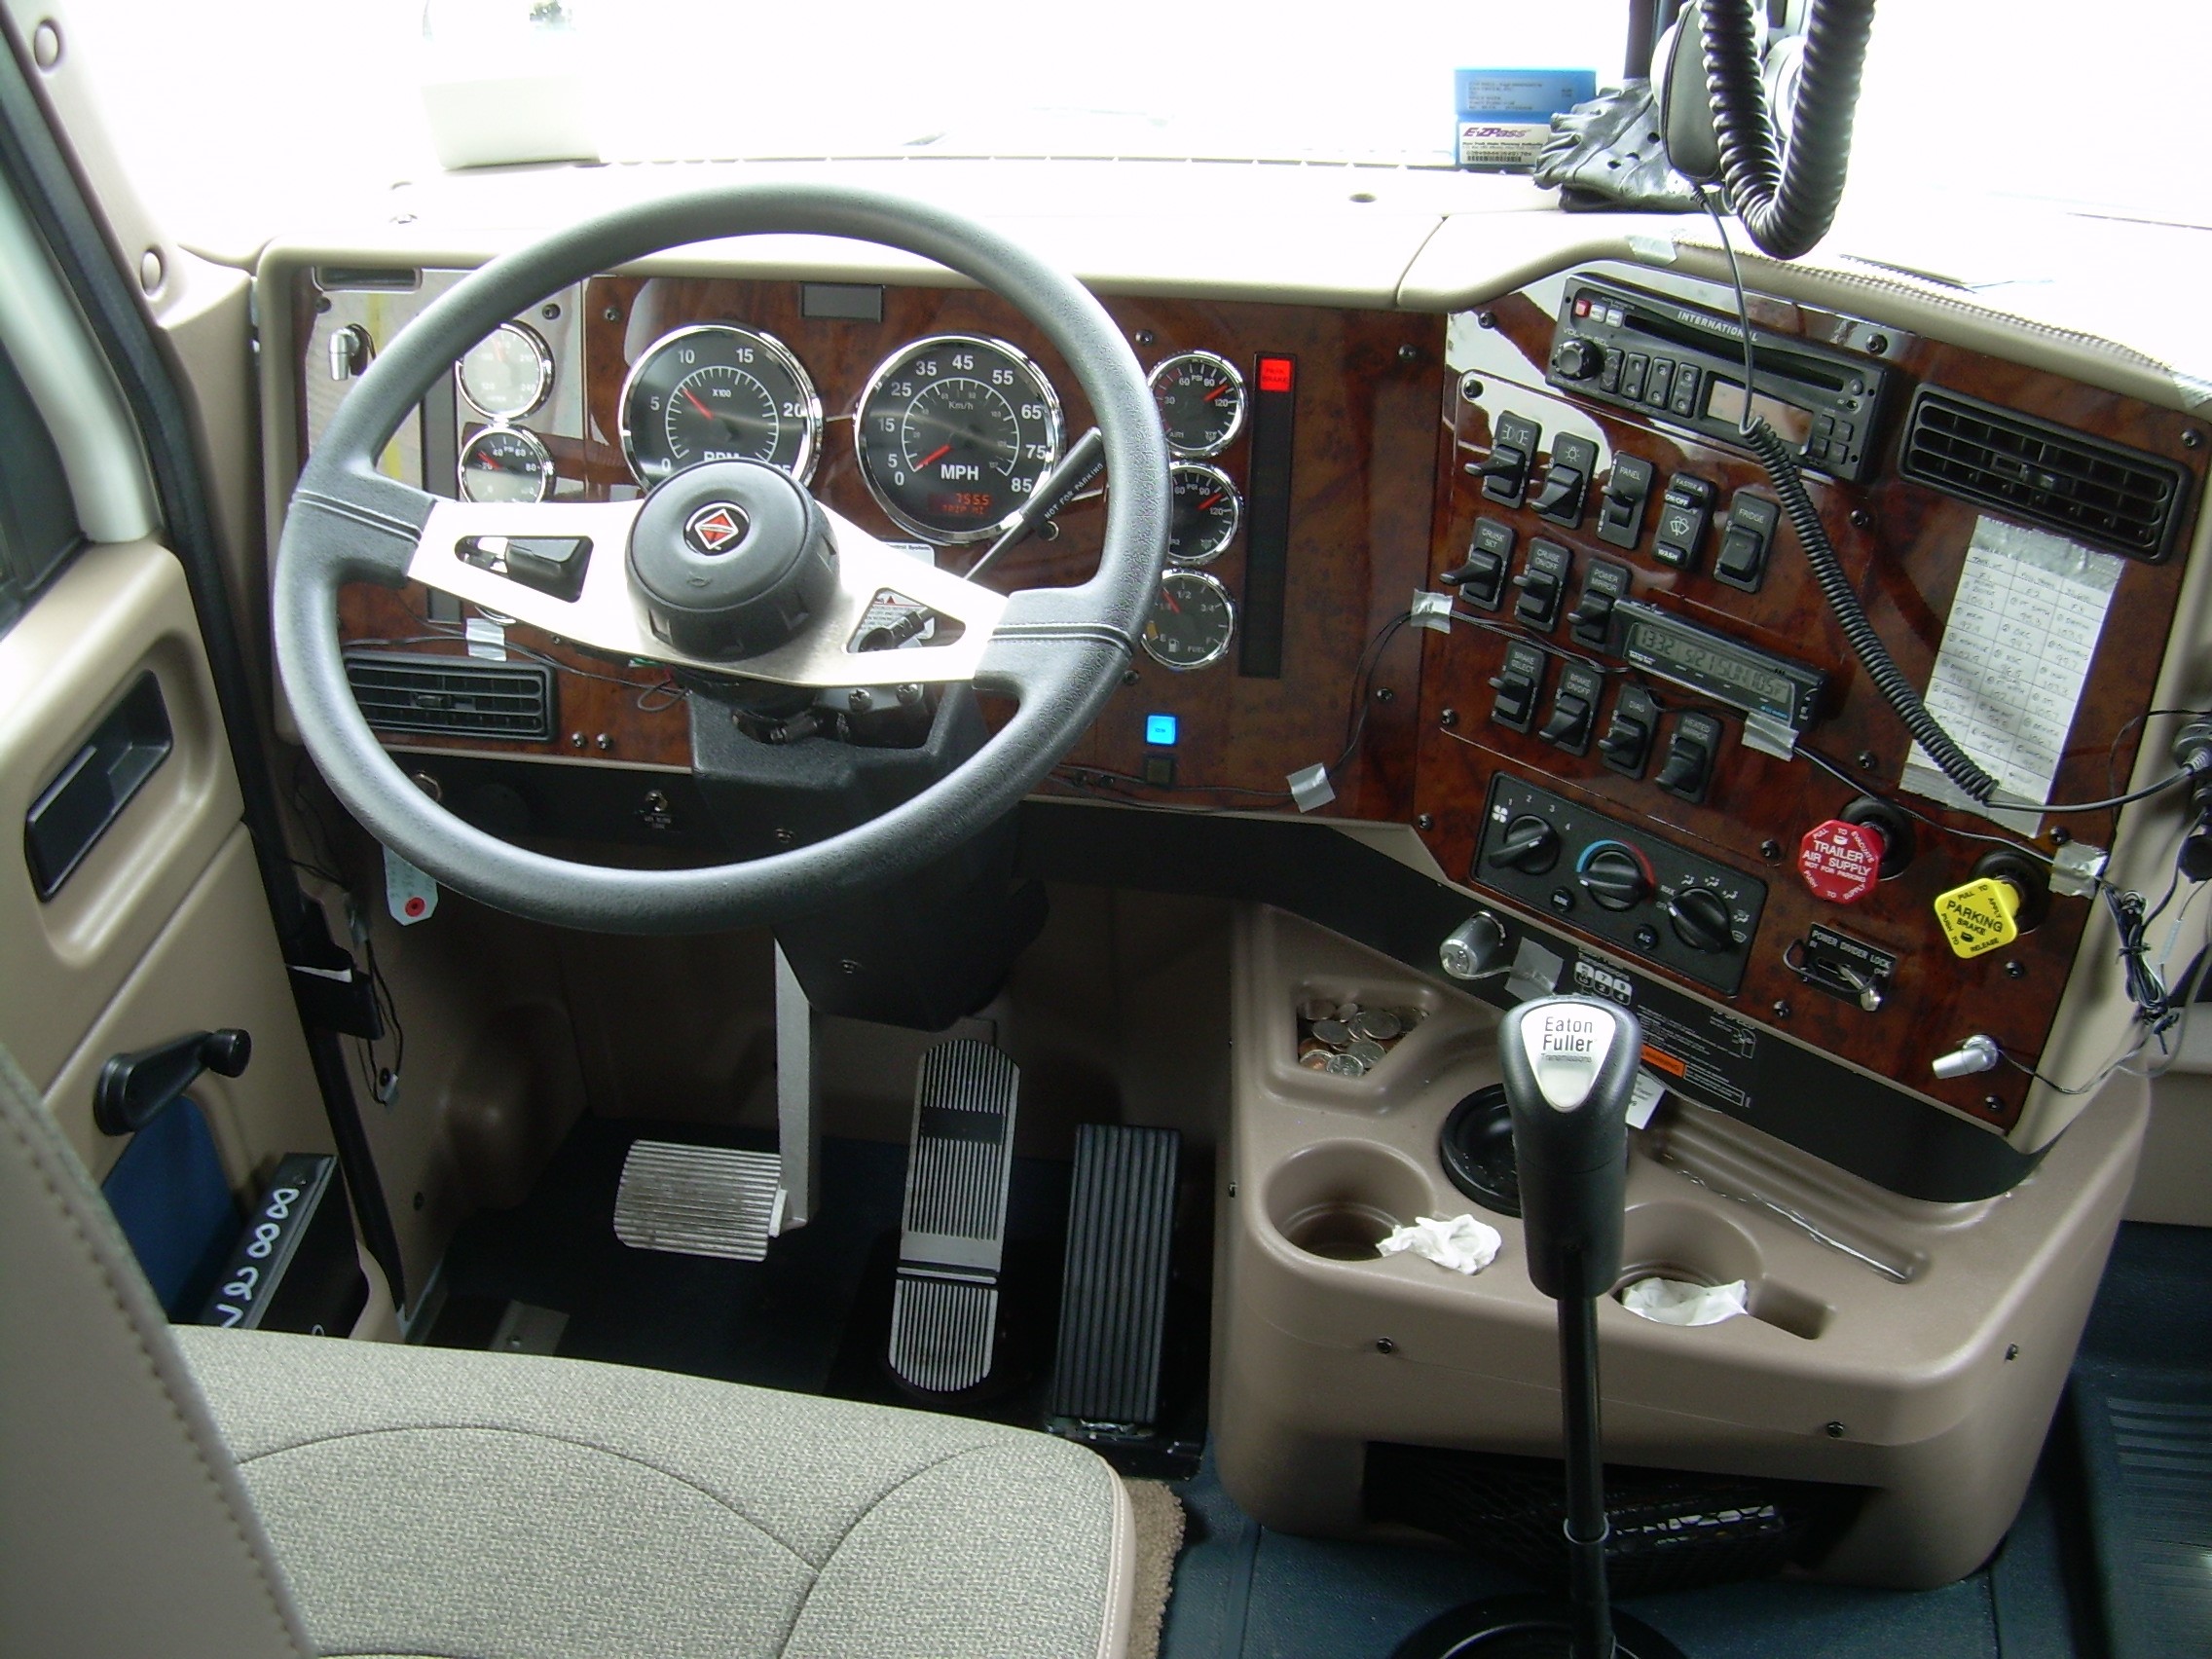
- Adjust Seat.
- Ensure mirrors are adjusted for clear visibility.
- Start Engine. Listen for any unusual noises.
- ABS light. If the vehicle is equipped with ABS brakes ensure ABS light comes on and turns off when the engine starts. The ABS light coming on and then turning off indicates that the ABS braking system is working. If the ABS light stays on, or doesn’t come on, something is wrong with the ABS braking system. (ABS (Anti-lock braking system) is an automated braking system that prevents the wheels from locking up (ceasing rotation) and avoiding uncontrolled skidding. ABS generally offers improved vehicle control and decreases stopping distances on dry and slippery surfaces.)
- Gauges:
- While air pressure is building check gauges.
- ENSURE OIL PRESSURE IS CLIMBING and that the oil pressure warning light goes off. (Oil pressure should build to the normal operating range within seconds of starting the engine.)
- Coolant temperature should begin to climb.
- Check fuel level, voltmeter charge and air psi.
- Check dash indicator lights (4-ways, high and low beam, blinkers).
- ENSURE THE WHEELS ARE CHOCKED.
Vehicle Inspection Checklist -
Air Brake Tests:
- Governor Cut Out Test:
- With engine running, check the air pressure gauge.
- If the air psi is not rising, pump the foot pedal gradually until the “governor cuts in” and air psi starts to rise.
- Watch for what psi the air pressure stops building. The maximum “Governor Cut Out” is 130 psi. (State what psi the air pressure stopped rising to the Examiner.) The Safety valve release is set at 150 psi. (If the safety valve releases air, something is wrong with the brake system.)
- Governor Cut-In Test:
- Check the “Governor Cut-In” by pumping service brake with engine running.
- Governor should not “Cut-In”, indicated by pressure starting to build, any lower than 85 psi. (If psi is already climbing, then the governor is already pumping. You cannot check the “Governor Cut-In” until the governor has first “Cut-Out”, as indicated by psi stopped rising.
- Rate of Air Pressure Build-Up Test:
- Psi rate should build 15 psi, example from 85 to 100 psi, within 45 seconds with the engine at normal operating RPMs in dual air systems. (If the air pressure does not build up fast enough, the pressure may drop too low during driving, requiring an emergency stop.)
- Brake Leakage Rate: - Static Test:
- Ensure the air system is basically fully charged.
- Ensure wheels are chocked.
- Release the parking brake.
- After the air pressure gauge needle settles, note the air psi.
- Start timing for one minute.
- State the psi drop rate to the examiner, if any. State the maximum psi drop rate to the examiner. The psi should not drop more than 2 psi in one minute with a single vehicle. (An air loss greater than those shown indicate a problem in the braking system and repairs are needed before operating the vehicle.)
- Brake Leakage Rate: - Applied Test
- Firmly depress service brake pedal.
- After the air pressure settles, note the air psi.
- Start timing for one minute.
- State the psi drop rate to the examiner, if any. State the maximum psi drop rate to the examiner. The psi should not drop more than 3 psi in one minute with a single vehicle.
- Low Air Warning Test:
- Turn the ignition switch to the “on” position without starting the engine.
- Pump the brake pedal until the low air warning signal comes on. The low air warning signal should activate between the ranges of 55 to 75.
- State what psi the low air warning signal comes on.
- Tractor Emergency Brake System Test:
- Ensure the parking brake is released, wheels are chocked and engine is off.
- Pump the brake pedal to reduce the air tank pressure until the air supply valve/yellow knob pops out. (You are checking to ensure the spring brakes come on automatically.)
- Note what psi the emergency brake knob popped out. State what psi the emergency brake knob popped out to the Examiner. The emergency brake knob should pop-out in the range of 20 to 45 psi. State the emergency brake pop-out range to the Examiner.
CHECK
THESE ITEMS WHILE
PRESSURE IS BUILDING:
- Ensure windshield has good visibility with no cracks, and no unauthorized stickers. Ensure dash is clear of obstructions. Ensure washer and wipers are working.
- Ensure sun visors are present, secure and working.
- Ensure defroster and heater are working.
- Ensure mirrors are clean and adjusted properly.
- Check fuel level, voltmeter charge and air psi.
- Check dash indicator lights (4-ways, high and low beam, blinkers).
- Check steering wheel free play. Steering wheel should have no more than ten percent wheel play before wheels starts to move. That is no more than 2” on a 20” wheel. (Power steering needs to be checked with the engine running.)
- Check electrical and air horns.
- Ensure the seat belts are secure and fasteners work. Checks to see that the seat cushion and seat mounts are secure.
- Ensure rear window is clean.
- Check dome light.
- Cab space should be clean. Secure all loose articles in the cab that might interfere with the safe operation of the controls or be a hazard in an accident.
- Ensure shifting column is secure.
- Check for accident kit.
- Make a 3-point cab exit.
- (REMOVE CHOCKS)
- TRACTOR SERVICE BRAKE TEST:
- Ensure chocks are removed.
- Put your seat belt on.
- Wait for normal air pressure operating range.
- Ensure it is safe to move vehicle. (State if it is safe to move the vehicle to the Examiner.)
- Pull tractor forward about 5 mph.
- Press the service brake pedal firmly and note if there is any unusual feel, brake pedal sticking, delayed stopping or pulling to one side.
- TRACTOR PARKING BRAKE TEST:
- Ensure your seat belt
on.
- Slowly move forward and apply the parking brake.
- Pull against
parking brake to ensure brakes are properly adjusted and applied.
- Cut engine off. Take keys.
Vehicle Inspection Checklist:
Trailer Hook-Up -

- Tools needed: gloves, flashlight and tire buddy.
Chock Trailer Wheels: Why Chock Trailer Wheels? Because if the brakes are out of adjustment, when you tap the trailer with the tractor, the trailer could move or roll and hit something. Even if trailer is equipped with spring brakes, the spring brakes would not work to the degree that the trailer brakes are out of adjustment.
- Look for any hazards to vehicle movement such as pedestrians, low hanging wires, tree limbs, other vehicles or objects.
- Check the overall vehicle condition.
- Note if the vehicle is leaning.
- Check trip manifests to ensure you have the correct trailer.
- Check the trailer service due date.
- Ensure glad hands are not damaged. Ensure glad hand hoses are secured and not cut.
- Ensure grommets are present secure, not worn, torn or cracking.
- Ensure electrical receptacles are clear of debris and points not bent.
- Ensure king pin is not bent. Check king pin shank and head for cracks, wear or chips.
- Check glide plate for damage or wear.
- Check landing gear and landing pad for damages and loose or missing nuts or bolts.
- Check to ensure the nut and bolt on the crank handle is secure.
- Trailer Chassis:
- Ensure there is no damage to the tractor chassis/frame or cross members or floor boards.
- Check frame brackets, axles, axle seats, anchor plates and clamp bolts to ensure there are no damages and no missing, broken or cracked parts.
- Ensure there are no missing or loose bolts or nuts and no broken or cracked welds.
- Ensure there are no loose or hanging hoses, electrical wiring or foreign objects.
- Ensure sidewall DOT reflective tape is present and in good condition.
- Tandems/Duals:
- Tandem/Dual tread should be a minimum if 2/32.
- Duals should have no uneven or excessive wear spots, no foreign objects in or between duals.
- There should be no damages to the sidewalls inside or out.
- There should be no damage or welding on tire rims.
- Ensure lug nuts are present and secure. (Rust trails or shinny rubbing areas indicate loose lug nuts.)
- Ensure valve stems are centered, no damages with valve stem covers present and secure.
- Trailer Dual Tire Brakes:
- Minimal brake lining is ¼ inch. Brake linings should be secure.
- Ensure there is no oil or grease on brake linings.
- Ensure brake drums have no cracks, dents or holes.
- Ensure brake chambers are secure, not leaking, cracked or dented with all nuts, bolts and cotter pins in place and secure.
- Ensure brake hose connections are secure and brake hoses are not cracked, cut, worn or rubbing and have no signs of leaking.
- Trailer Rear:
- Look for any hazards to vehicle movement such as pedestrians, low hanging wires, tree limbs, other vehicles or objects.
- Ensure bumper is secure and not damaged.
- Ensure license plate is present, clean and secure with a working plate light.
- Check tail lights, running lights and marker lights.
- Ensure cargo is secure.
- Ensure you have the correct cargo for the trailer with the first stop loaded last.
- Ensure cargo door is locked and door has no damages.
- Check cables for frays or brakes.
- Ensure the lift gate is working and all bolts are present and secure.
- Ensure mud flaps are present, secure and not damaged.
- Ensure Trailer Hub odometer, if equipped, is not damaged.
- Check condition of tandems.
- Check outside trailer wall, frame and floor.
- Check condition of side door, if any, and ensure door is locked.
- Trailer Hook-Up Procedure:
- ENSURE TRAILER WHEELS ARE CHOCKED.
- Make a 3-point entry into the cab.
- Start truck engine.
- Ensure lights and flashers are turned on.
- Put seat belt on.
- State if it is safe to move the vehicle.
- Honk before backing.
- Back to the trailer until the fifth wheel just touches the trailer. Do not “hit” the trailer. (The trailer height should be slightly lower than the center of the fifth-wheel so the trailer is raised slightly when the tractor is pushed under it. Raise or lower the trailer landing gear as needed.)
- STOP.
- Set the tractor parking brake.
- Put the transmission in neutral.
- Take the tractor key.
- Make a three-point tractor exit.
- Check the trailer height to the fifth wheel.
- Check the king pin alignment to the fifth wheel.
- Charging Trailer Brake System:
- Check trailer glad hands and grommets for damage.
- Connect the air lines. Ensure air lines are properly secured.
- Connect electrical lines. Ensure they are firmly plugged in and secured.
- Make sure the air and electrical lines are safely supported where they won’t be crushed or caught while the tractor is backing under the trailer.
- Return to tractor cab.
- Push the trailer air supply knob (red knob ONLY) to supply air to the trailer brake system.
- Build the air up to governor operating range of 85 to 130 psi.
- Turn the engine off.
- Pull down the trolley brake and release to listen for the trailer brakes setting up and releasing.
- Listen for air leaks.
- SET THE TRAILER BRAKES with the red knob.
- Tractor to Trailer coupling:
- Put seat belt on.
- State if it is safe to move the vehicle.
- Honk before backing.
- Release TRACTOR PARKING BRAKE ONLY.
- Ensure the trailer brakes are still set up.
- Complete backing under trailer. Watch to see that the airlines do not get pinched. Do not “hit” the trailer.
- When connected, tug against the trailer to ensure the fifth wheel jaws are locked firmly around trailer king pin.
- Set the tractor parking brakes.
- Put the transmission in neutral.
- Turn the engine off.
- Turn lights and flashers on.
- Make a 3-point exit. (Take flash light and gloves).
- Use flashlight to visually ensure the fifth wheel locking jaws are locked around the shank of the king pin, and not the head of the kingpin.
- Ensure there is no space between the fifth wheel and the trailer glide plate.
- Ensure that the release arm is securely seated in the lock position and safety latch is engaged.
- Crank the trailer landing gear all the way up and secure the crank handle.
- Ensure that there is plenty of clearance between the tractor frame and trailer landing supports.
- Ensure there is plenty of clearance between the top of the tractor tires and the nose of the trailer.
- Ensure mud flaps cannot get pinched between tandems and landing supports during turns.
- Ensure fifth wheel slide pins are locked in place, if equipped.
- Ensure the air or electrical lines are supported and cannot hit or get snagged on any moving parts. Ensure the air and electrical lines are long enough so they do not get damaged of disconnected during turns.
- Trailer Lights: Ensure trailer marker lights, running lights, tail lights and license plate lights are working.
- Check Trailer brake lights and blinkers:
- Reenter cab.
- Turn lights off.
- Turn left blinker on. (Lights should be red, yellow or amber.)
- Release the trailer brakes.
- Pull trolley brake/signal line on.
- Make a 3-point exit.
- Check trailer brake lights and left blinker. (Blinker lights should be red, yellow or amber.)
- Set the tractor and trailer breaks and release the trolley brake.
- Put right blinker on and check right blinker lights. (Lights should be red.)
- Reenter cab, turn lights and flashers on.
- Check trailer taillights, marker lights and flashers.
- Tractor/Trailer Static Brake Test:
- Ensure wheels are chocked.
- Release the parking brake.
- Start the engine and recharge the brake system if needed.
- Cut the engine off.
- After the air pressure settles, note the air psi.
- Start timing. The psi should not drop more than (3) psi in one minute with the tractor and trailer.
- State the psi drop rate to examiner, if any.
- Tractor/Trailer Applied Brake Test:
- Firmly depress service brake.
- After the air pressure settles, note the air psi.
- Start timing. The psi should not drop more than (4) psi in one minute with the tractor and trailer.
- Check Tractor Protection Valve Test:
- Ensure the tractor/trailer braking system is charged.
- Cut engine off.
- Release the trailer parking brake (push the red air supply knob in).
- Step on and off the brake pedal to reduce the air pressure in the tanks.
- The “tractor protection valve” also called the trailer air supply control should pop out in the range of 20 to 45 psi.
- Note what psi the tractor protection valve knob popped out. State what psi the tractor protection valve knob popped out to the Examiner. The tractor protection valve knob should pop-out in the range of 20 to 45 psi. State the emergency brake pop-out range to the Examiner. (If the tractor protection valve does not work properly, an air hose leak could drain all the air from the tractor. This would cause the emergency brakes to come on, with possible loss of control.)
- Trailer Service Brake System Test:
- Remove chocks.
- Put seat belt on.
- Ensure it is safe to move vehicle. (State if it is safe to move the vehicle to the Examiner.)
- Pull vehicle forward about 5 mph.
- Pull trailer hand brake/trolley brake down to ensure the trailer service brakes set up and hold. (This tells you the trailer brakes are connected and working.)
- Trailer Emergency/Parking Brake Test:
- Ensure chocks are removed.
- Put seat belt on.
- Ensure it is safe to move vehicle. (State if it is safe to move the vehicle to the Examiner.)
- Pull forward to ensure the vehicle rolls freely.
- Stop. Pull out the trailer air supply, red knob. (Set the trailer emergency/parking brakes only.) (Do not set the tractor parking brakes.)
- Tug on the trailer to ensure that the trailer emergency/parking brakes set up.
- Disconnecting Trailer:
- Park only where ground is hard enough to support trailer weight.
- Set the trailer parking brakes.
- Release the tractor parking brake.
- Put transmission in reverse just enough to ease the pressure on the locking jaws.
- Set the tractor parking brakes while the tractor is pushing against the trailer kingpin.
- Make a 3-point exit.
- Lower landing gear until it makes firm contact with the ground.
- Disconnect and secure air and electrical lines. Ensure they are safely stored so they don’t get damaged while driving.
- Release the fifth wheel lock.
- Chock the trailer.
- Return to tractor.
- Put the seat belt on.
- Ensure it is safe to move vehicle. (State if it is safe to move the vehicle to the Examiner.)
- Pull tractor forward until the fifth wheel comes out from under the trailer. Ensure the trailer landing gear and ground are supporting trailer. If in doubt, make a 3-point exit and visibly check to ensure surface is holding weight. (Keep in mind dirt lots turn to mud when wet and may not support weight.)
- Pull away from trailer.
- Put the transmission in neutral.
- Set the tractor parking brake.
- Cut engine off.
- Turn lights off.
- Remove keys.
- Lock the doors.
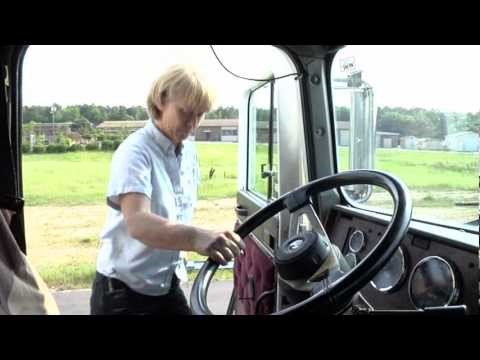
Published on Nov 3, 2014
This is Jeff from the Apex CDL Institute demonstrating how
to perform a Class A CDL pre-trip inspection on a tractor trailer
(Commercial Vehicle). The commercial vehicle inspection checklist demonstrated
here is as thorough a vehicle inspection I have seen. I highly recommend
reviewing Jeff’s vehicle inspection video many times as you prepare
for your vehicle inspection exam.
All commercial vehicle drivers must perform a comprehensive vehicle pre-trip inspection according to the Federal Motor Carrier Safety Regulations (49 CFR, Part 396.13). The commercial vehicle inspection checklist found in your States "Commercial Driver's Handbook", from your local DMV (Department of Motor Vehicle) is a comprehensive vehicle inspection aide to ensure there are no safety checks missed while preforming your vehicle pre-trip inspection.
A commercial vehicle pre-trip inspection is intended to increase safety for everyone on the road, including the driver and other motorists. Items included on a commercial vehicle checklist are what the Department of Transportation inspects at weigh stations and safety checkpoints. Preforming a thorough vehicle pre-trip inspection before you begin your journey is a safeguard against possible penalties from the Federal Motor Carrier Safety Administration (FMCSA) or down time from being placed out of service.
By inspecting your vehicle thoroughly before you head out on highway, you can also prevent more costly repairs and keep your vehicle rolling.
It is the driver's responsibility to ensure that his/her vehicle is safe to operate.
The use of a vehicle inspection checklist also serves as a preventative action against more serious breakdowns or accidents.
Commercial Vehicle Inspection Checklist Practice Questions
Exit Commercial Vehicle Inspection Checklist
to the
Center for Money Making Ideas home page.
Exit Commercial Vehicle Inspection Checklist to
the Money Making Ideas Exchange Center.
Exit "Commercial Vehicle Inspection Checklist" to
"Top Job Search Websites for 2018".
Commercial
Vehicle Inspection Checklist
Commercial
Vehicle Inspection Checklist

Commercial
Vehicle Inspection Checklist
Commercial
Vehicle Inspection Checklist
Commercial
Vehicle Inspection Checklist
Commercial
Vehicle Inspection Checklist
Commercial
Vehicle Inspection Checklist
Commercial
Vehicle Inspection Checklist
Commercial
Vehicle Inspection Checklist
Commercial
Vehicle Inspection Checklist
Commercial
Vehicle Inspection Checklist
Commercial
Vehicle Inspection Checklist
Commercial
Vehicle Inspection Checklist
Commercial
Vehicle Inspection Checklist
Commercial
Vehicle Inspection Checklist
Beyond Your Commercial Vehicle Inspection Checklist
Learn to drive trucks and get your commercial license the right way by attending a state licensed truck driving school that has a good job placement reputation.
Accredited truck driving schools offer easy-to-understand classroom and on-the-road training for men and women who are interested in earning or renewing their Class A, B, and/or C CDLs.
Truck driving schools can help you
get the education, training, and experience you need to break into the trucking
and transportation industry. Begin your journey today in the transportation industry
where your options are limitless.
Get matched to CDL Driving Schools near you!
State Licensed Trucking Schools
Some companies provide on the job training with no experience needed and job placement programs
Many truck driving schools provide ongoing job placement assistance.
Even after we do a thorough pre-trip inspection, we may still have an occasional driving infraction with legal entanglements.
You know how stressful a legal entanglement can be, whether it's a pre-existing traffic violation or a serious traffic violation. The attorneys at TVC Pro-Driver, Inc. specialize in handling traffic violations of their clients ethically and competently through the court of original jurisdiction.
You take a tremendous
risk if you don't have solid legal counsel and representation at your side. Let
TVC Pro-Driver, Inc. be your representation for all your moving and non-moving
violations. Use the Company Professional Drivers Use!